Restrict It Content Restriction is a lightweight and powerful plugin that allows you to take complete control of your website’s content by restricting access to pages/posts to logged in users, specific user roles or to logged out users.
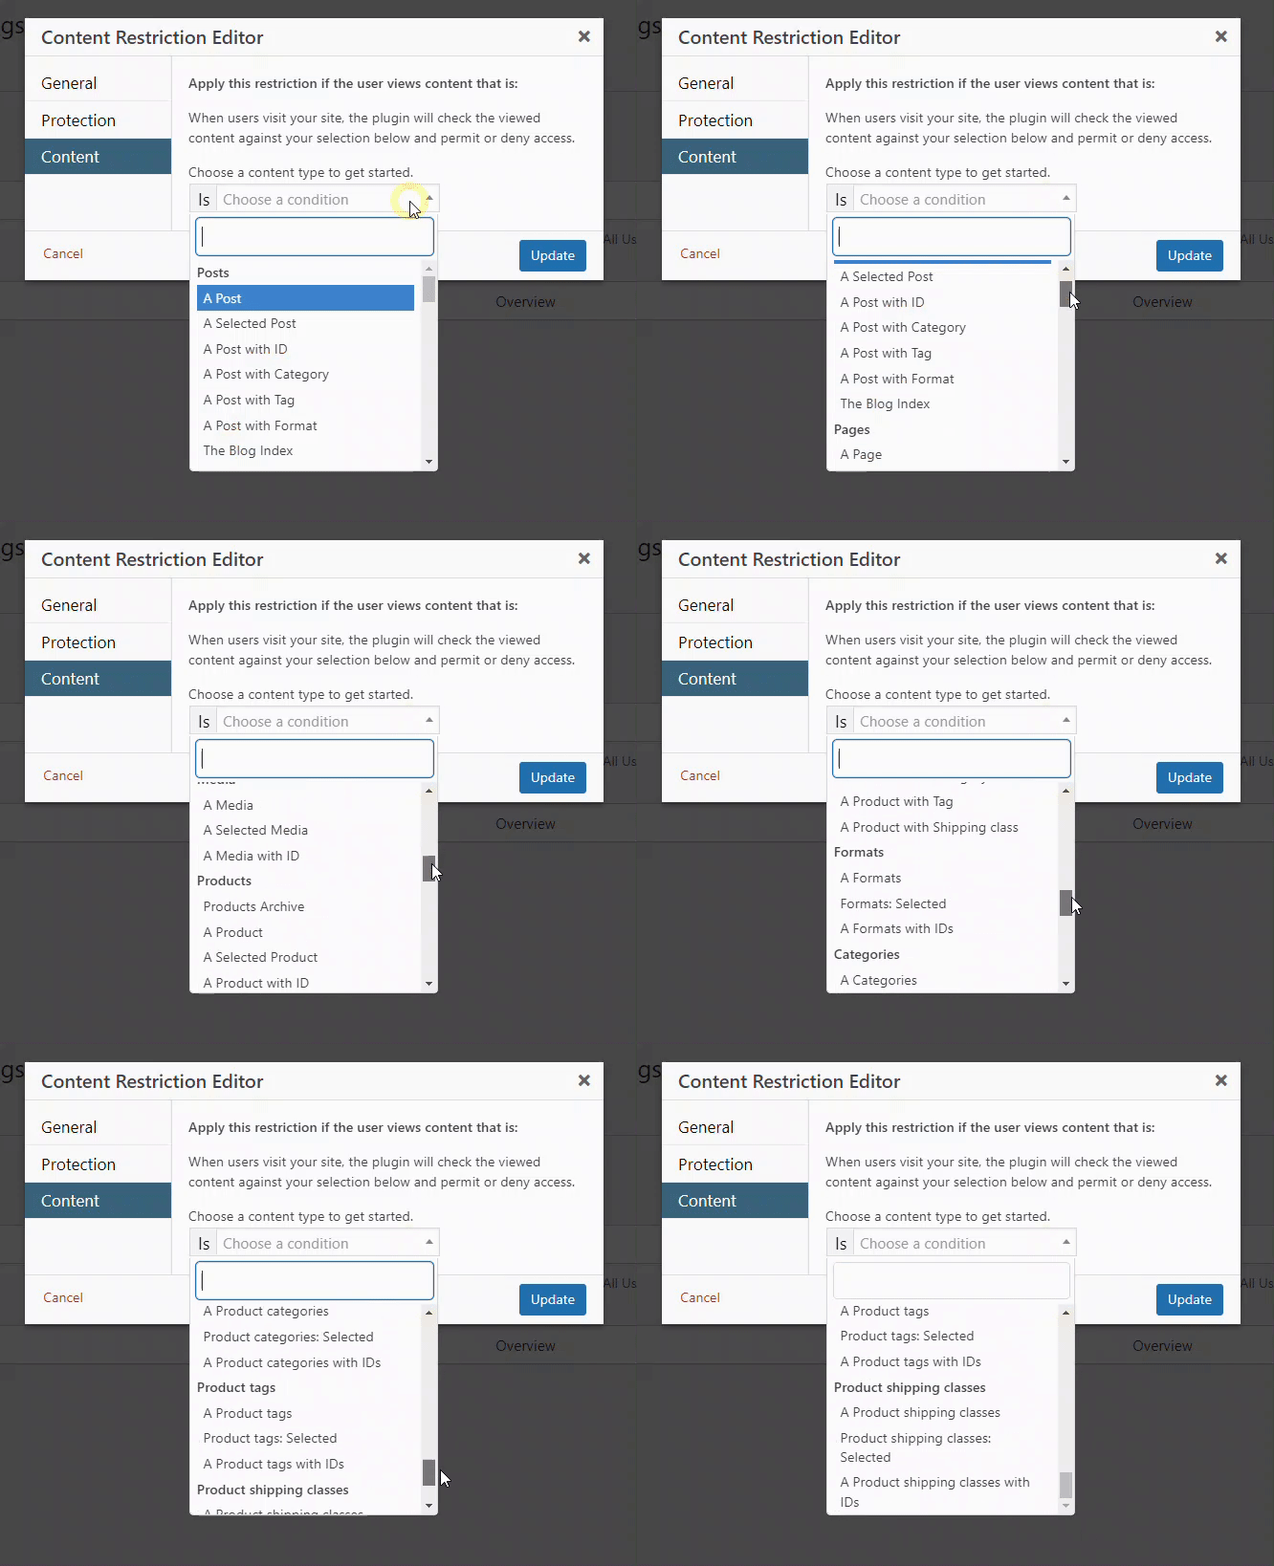
SHORTCODE EXAMPLES:
The plugin also enables you to restrict access to certain parts of a page/post using shortcodes like the example below which would hide the content to logged out site visitors.
This example allows only logged in subscribers and editors to see the text “Logged in content”.
If you are logged out or aren’t logged in as a subscriber or editor, you’ll see the “You don’t have access to this.” denial message.
All parameters are optional. If you add a parameter, make sure it’s followed by an equals (=) sign and the values of your parameters are inside double quotes (“”).
List of Shortcode Parameters:
- Roles – By default, all roles will have access to restricted content. If you want to give access only to specific roles, add this parameter with a comma-separated list of valid WordPress user roles wrapped by double quotes (“”).
- Logged_out=”1″ – Only logged out visitors can see this content. If you want the opposite (only logged-in people can see the content), leave this parameter out. I.e., By default, Restrict It restricts content so only logged-in visitors can view it.
- Class – Add the name of your custom CSS class if you want to add custom styles to your restricted content.
- Message – Your custom denial message if you want to override the default message from the plugin settings.
Restrict Content of Widgets:
This plugin allows you to control the visibility of each sidebar/footer widget by selecting who can view each widget (everyone, logged out users, logged in users, specific user roles).
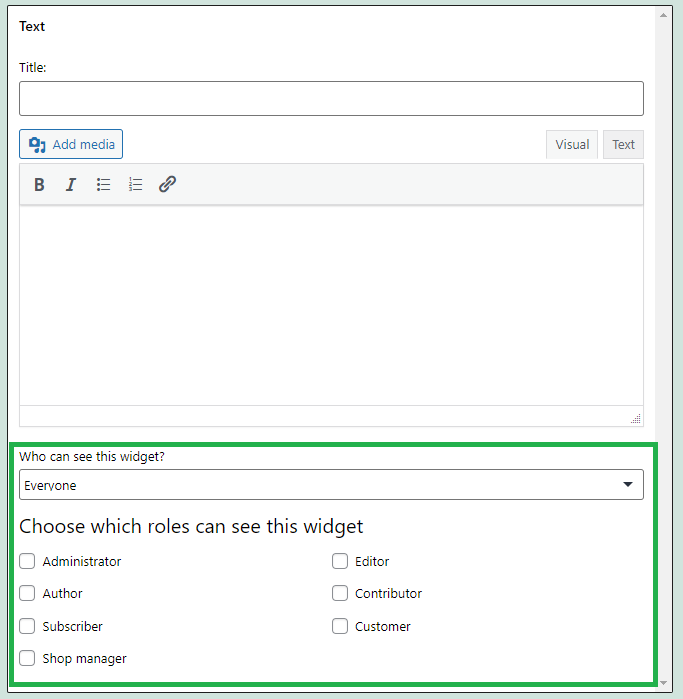
List of Plugin Features
Restrict It Content Restriction allows you to do the following:
- Restrict access to pages/posts to logged in/out users or specific user roles
- Restrict access to media attachment pages, tags, categories, format to logged in/out users or specific user roles
- Display a custom message to users who do not have permission to view the content
- Redirect users who do not have permission to view the content to login page (redirects back to page/post after login), website homepage or custom URL
- Display certain content on a page/post to logged in users only
- Display certain content on a page/post to specific user roles
- Display certain content on a page/post to logged out users
- Apply custom CSS classes to on page content restriction shortcodes
- Control the visibility of each sidebar/footer widget by selecting who can view each widget (everyone, logged out users, logged in users, specific user roles).
Note: Restrict It restricts access to media at the content level via the media attachment pages.
Restrict It does not restrict access at the server level to actual media files (e.g.: .jpg, .gif, .pdf, and .webp files).
List of parameters:
- Roles – By default, all roles will have access to restricted content. If you want to give access only to specific roles, add this parameter with a comma-separated list of valid WordPress user roles wrapped by double quotes (“”).
- Logged_out=”1″ – Only logged out visitors can see this content. If you want the opposite (only logged-in people can see the content), leave this parameter out. I.e., By default, Restrict It restricts content so only logged-in visitors can view it.
- Class – Add the name of your custom CSS class if you want to add custom styles to your restricted content.
- Message – Your custom denial message if you want to override the default message from the plugin settings.
How to use Restrict It Content Restriction plugin
Step #1 – Obtain The Plugin
You possibly can click on on the hyperlink or the button under to immediately obtain our FREE Restrict It Content Restriction plugin.
https://www.wpfixit.com/restrict
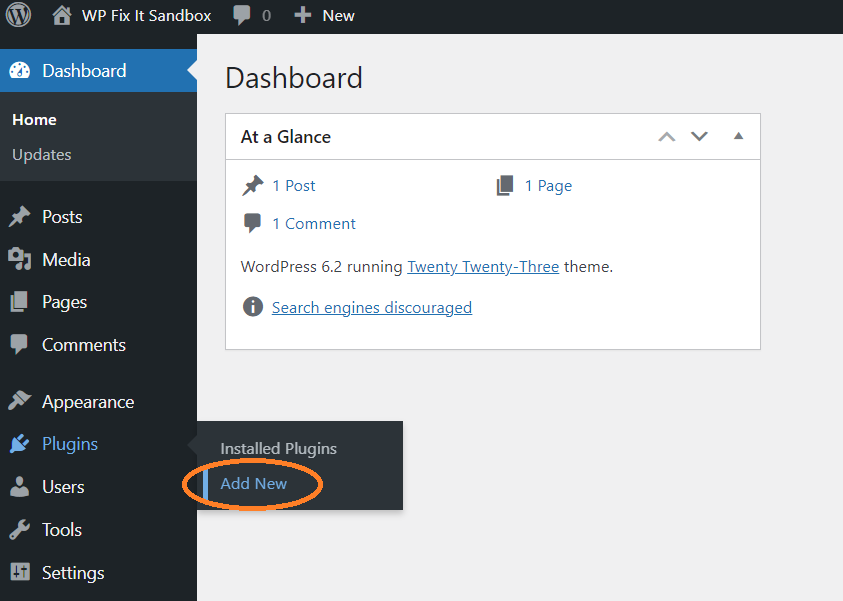
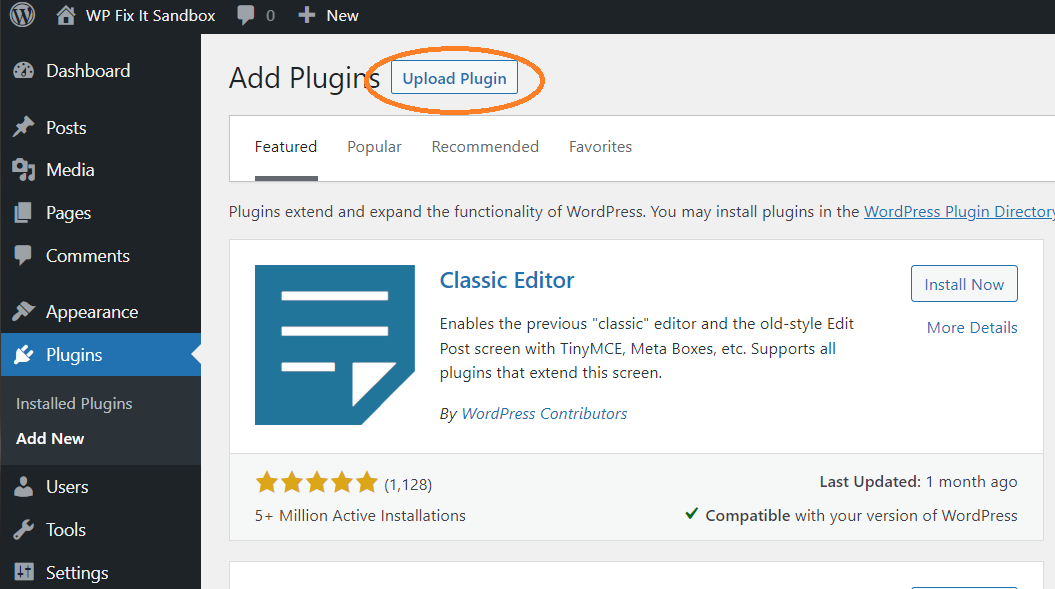
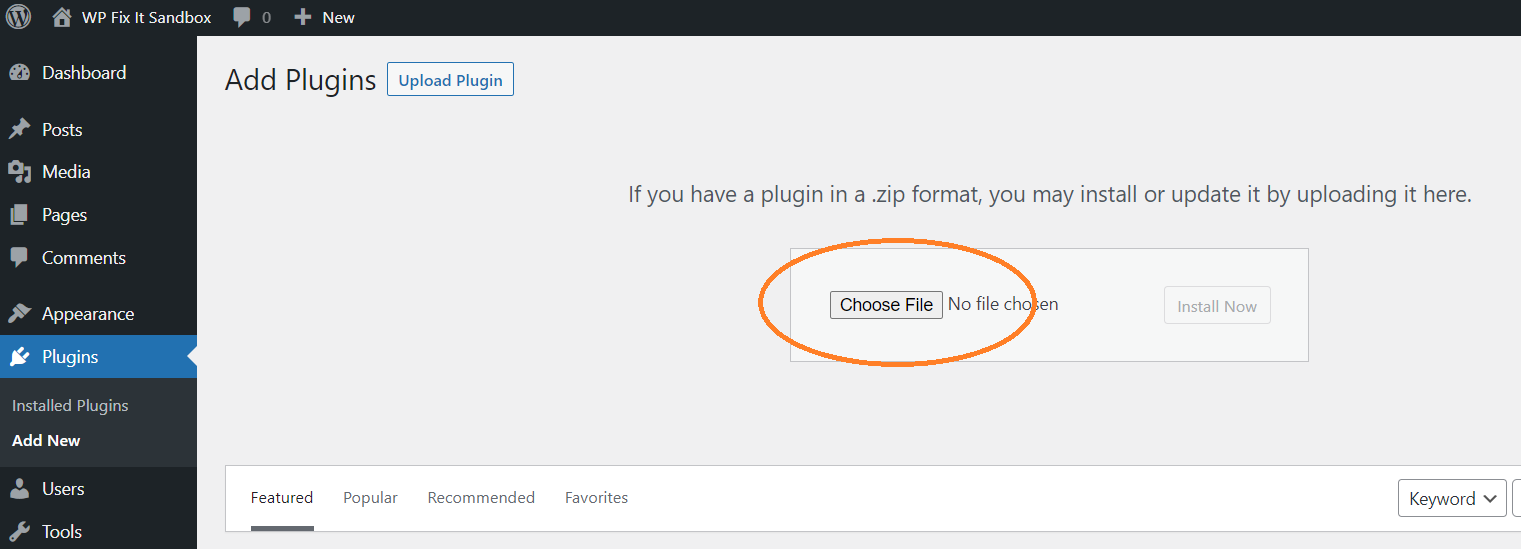
Step #2 – Set up & Activate The Plugin
After you have downloaded the plugin, it is now time to put in and activate it in your web site by following the steps under.
Step #3 – Go to Your Setting Area
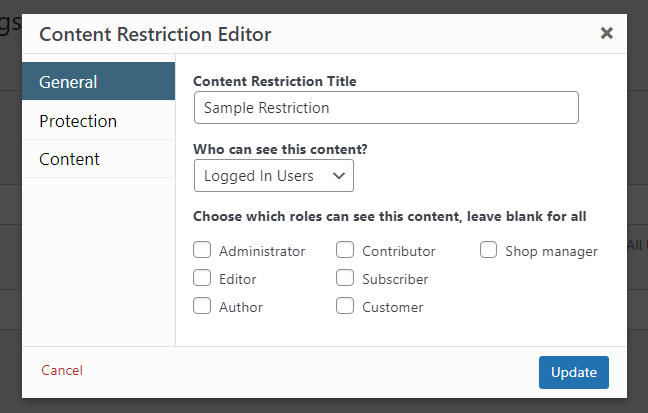
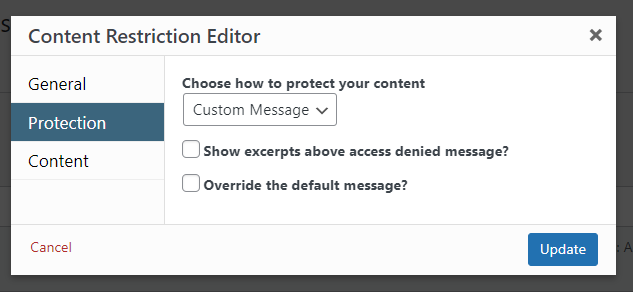
After you have downloaded the plugin all you need to do is visit the restrictions settings area to start using it.


Obtain this FREE Restrict It Content Restriction Below
Click on on the button under to obtain this free plugin immediately and start creating content restrictions.


