Need to learn how pick a WordPress theme?
Once you’ve finished creating your website, choosing a theme will be the next task on your checklist. Thousands of them exist on the market today. This can make finding the correct one a daunting task. Luckily for you, I’ve created a simple guide that is going to break down the process into a simple, step-by-step process.
First things first, what type of website did you create? Is it a simple blog, company page, online shop, app portfolio, or something not listed here? You always want to choose a theme that’s related to your niche.
For example, a blog about cats can get away with a basic theme. The blog will not need any fancy sliders or extra functionality.
Another example includes Apple.com. This website includes sliders, sales pages, videos, credit card forms, and artistic images. Obviously, you will not need a website with all of these features unless you have several products to sell. Try to keep it as simple as possible.

What Works Best, a Free or Premium Theme?
For most beginner sites (see the cat blog example above), a free theme will suffice. You can find hundreds of them in the WordPress Theme Directory. All themes in the directory are quality controlled by WordPress. This will ensure that they contain no malware and make the use of proper development techniques.
Please exercise caution with free themes outside of the WordPress directory as some contain malware and other issues. Most free themes will be an excellent choice for your website. Just make they stay updated and include some level of support behind them. Sites without frequent updates and support will make your site vulnerable to malware.
If you want to take your site to the next level, you’ll need to spend a little extra money on a premium theme. What separates premium themes from free themes? Firstly, most free themes will force you to give a backlink in the footer. This removes an element of professionalism from your website. Secondly, the chances are that someone else will be using the same theme which will prevent your site from standing out. These are not big issues, but they will be something to think about once you start gaining more traffic.
The primary benefits of premium themes are better support, more customization options, faster updates, and visually appealing designs. Almost everything in a theme’s framework is improved when you upgrade to premium offerings.
Basically, it is up to you to determine which option suits you and your website best. My rule of thumb is to stick with basic themes and upgrade to more complex themes in the future if your site requires it.
Why Responsive Design is a Must
What is a responsive design? Responsive design optimizes your website’s layout for the smaller displays of mobile devices. Responsive designs remove the need to zoom, scroll left and right, and press small links. Responsive design is a requirement if you want your website to be accessible by all people on the internet.
Since mobile users now represent a large amount of traffic, you could be losing a sizable readership if your theme is not responsive. Most themes are responsive by default nowadays, but a few are still behind the times. You’ll be able to tell if they are responsive usually in their description.

Wondering if your current theme is responsive? If so, you can perform a Google search for “mobile theme test” and find a website that’ll test your theme on multiple screen resolutions.
Google and other search engines are now identifying which websites are mobile and which ones are not. You can find out if a site is mobile-friendly by searching for the website on a mobile device.
Will a mobile optimized website help me rank better in Google? As always, figuring out Google’s algorithms is not an exact science. It is hard to determine if this will increase your rankings on mobile devices. Nonetheless, I do believe that people will be more likely to click on mobile-friendly search results over results that don’t make the use of responsive design.
What about Support?
Having a support team behind you is a must. Issues occasionally arise in themes that cannot be fixed unless you have experienced in web design. There’s nothing more frustrating than dealing with a broken theme. Going back to the free vs. premium debate, support is usually going to be faster and more reliable on the premium end. Groups that provide support within 24 hours or less are preferred. Anything longer will keep you “stuck” trying to fix issues.
Are Memberships Worth It?
Memberships give you unlimited access to all their themes (and sometimes plugins). While it may sound like a great offer, why would you need unlimited themes for just one website? I recommend choosing one theme and using it until the design gets stale or extra functionality is required. Unless your theme is completely unusable or outdated, your web users will not put too much value in your theme design. Ultimately, it will be the content that counts. Changing your theme too often will result in wasted time that could have been spent making content.
For instance, you could design the prettiest website in the world and still get no traffic without content. On the contrary, you could have a very basic theme and still receive high amounts of traffic as long as your content is interesting. The key point here is not to get caught in having the latest and greatest design. Websites that puts an emphasis your content will do just fine.
Now don’t get me wrong, memberships can be a great thing, especially if you own multiple sites and would like to use different themes on them. Just don’t get caught up in paying for expensive monthly or yearly memberships that you probably don’t need.
Too Many Functions?
Don’t worry about buying a theme with “100s of features” unless you actually need them. Many developers are guilty of stuffing their themes with features that the average user will not need. There’s nothing worse than buying a highly complex theme for your simple blog and not knowing how to use it. Not only that, these themes tend to be poorly optimized and can bring your site to a crawl when it receives high loads of traffic. It is best to stay away from these themes unless you absolutely need their features.
Use Caution With Big Directories
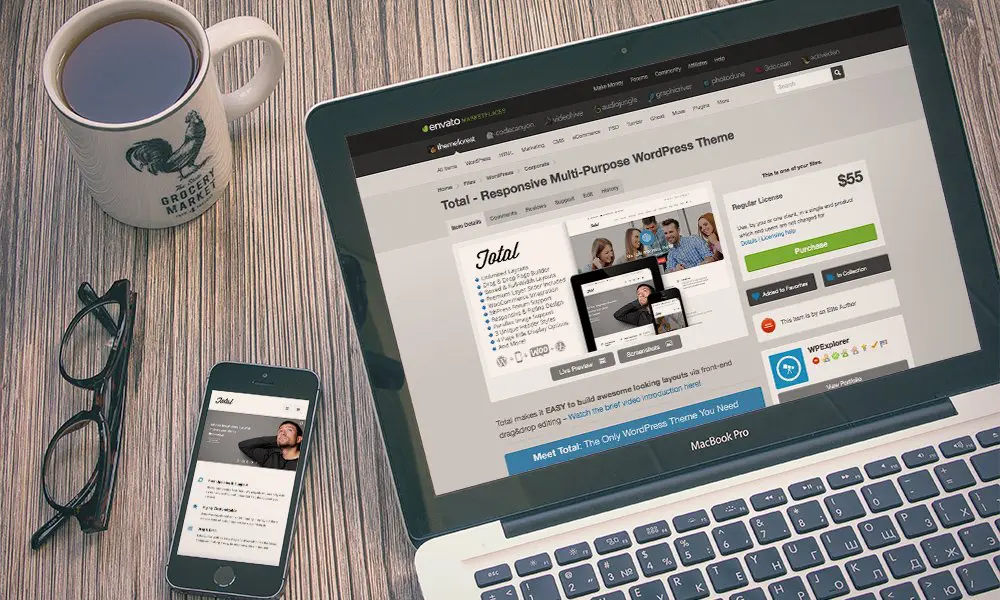
I recommend using caution with big directories like ThemeForest, Mojo Themes, and others. Since almost anyone can add themes to most directories, quality control is somewhat of an issue. I’ve used many themes from ThemeForest that are full of issues due to the feature “stuffing” I mentioned above.
Page Speed
Optimizing your website for page speed is very important. Have you ever clicked on a webpage only to wait 5 seconds for it to load and then decide to press back? Preferably, you are going to want a theme that loads in less than 5 seconds. People’s attention spans are short, and you’ll want to ensure that you capture it before they get bored and leave your site.
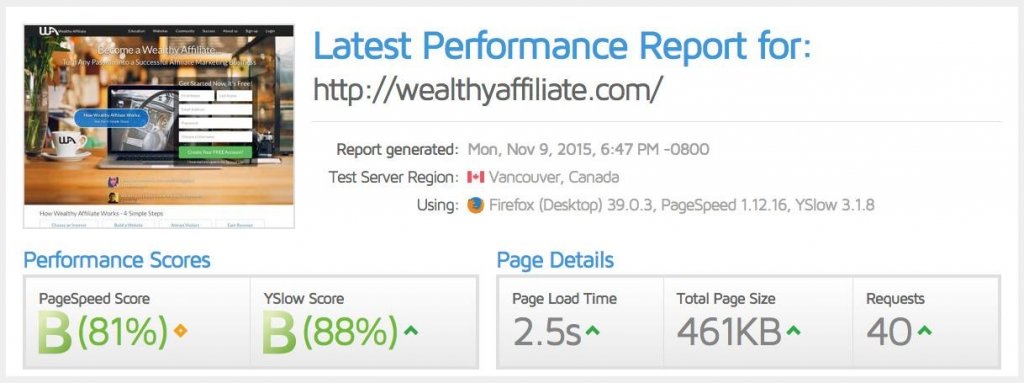
Testing a site’s page speed and optimization is easy. You can head over to GTmetrix and type in a link to a theme’s demo. I ran a test on WealthyAffiliate.com (an excellent source for affiliate marketing) and received performance scores around 85% on average. Anything above 80% is considered good; anything above 90% is considered excellent. The page loaded in around 2.5 seconds. This is fast and achieves the modern standard.
What Do the Reviews Say?
This is an important question to ask when deciding if a theme is worth purchasing. Don’t just read the 5-star ratings. Take notes from the lower ratings as well. Do not waste your hard-earned cash on broken themes.
SEO (Search Engine Optimization)
This is not a big deal when it comes to choosing a theme. Search engine optimization takes care of simple formatting for your site in search engine results. Even if the theme is not entirely optimized, you can find plenty of plugins that’ll optimize your website for search engines. You do not need to find the perfect theme for SEO as long as the basics are included.
Is It Worth the Price?
Most premium themes will run around $45-70. I do not recommend spending over $100 unless the theme has extra functionality that cannot be found elsewhere.
Some Tips and Tricks
Add WordPress Tags to Your WordPress Theme
A couple of weeks ago the WordPress community was blessed with the latest release from the WordPress team, now known as WordPress. One of the included features was an extremely important and extremely useful one, which adds built-in tags to WordPress.
If you have already upgraded to WordPress and want to take advantage of this new feature, you will probably have to manually add this tagging feature to your theme. In order to add tags, you simply need to paste the following code where you want to display the tags:
<?php the_tags(); ?>
This will actually add the text “Tags:” before the output of tags, so you will not need to do this manually. If you would like to proudly display your tags in a cloud somewhere (most commonly in your sidebar), you can easily do so by using the following code:
<?php wp_tag_cloud(‘smallest=8&largest=36&’); ?>
This code tells WordPress to display your tags in alphabetical order with the smallest text being 8-point font and the largest font is 36-point font. You can adjust the font sizes to your preference.
If you would prefer to stick with the Ultimate Tagging Warrior plugin, the author has stated that the plugin will be updated to work with WordPress. Most people, though, would probably prefer to switch to the new built-in tagging system. If you’d like to make the switch from UTW to the new WordPress tagging system, WordPress has made it easy to make the conversion with their import feature. You can find the import option under the Manage tab in your Dashboard. In addition to the ability to import your UTW tags, WordPress also allows you to import tags from other plugins such as Bunny’s Technorati Tags and the Simple Tagging plugin.
Creating a Two-Tiered Navigation Menu
If you’ve been following the recent trends with premium WordPress themes, you’ve probably noticed that the two-tiered navigation menu has become extremely popular. An example of this is the popular Revolution WordPress themes. This style of menu can be used in a variety of ways, but the most common seems to be to display your children pages in a menu below your blog’s parent pages.
If you’ve wondered how to hack your existing WordPress theme to accomplish something along these lines, here is the PHP you’ll need:
<ul id=”nav”>
<?php wp_list_pages(‘title_li=&depth=1’); ?>
</ul>
<?php if($post->post_parent)
$children = wp_list_pages(“title_li=&child_of=”.$post->post_parent.”&echo=0″); else
$children = wp_list_pages(“title_li=&child_of=”.$post->ID.”&echo=0″);
if ($children) { ?>
<ul id=”subnav”>
<?php echo $children; ?>
</ul>
<?php } else { ?>
<?php } ?>
Once you’ve got the code in place, you’ll want to style it to look the way you want it to.
Tell WordPress to Function Like a CMS
So, you have an established WordPress blog, but you’ve seen the pro bloggers doing it and now you want to turn that blog into a Content Management System (CMS)? Many people probably weren’t aware of this trick (including many web developers), but one neat feature added with WordPress was the ability to have a different home and blog page without needing to install WordPress on a completely new directory.
In order to accomplish this, you first need to make sure that the page that you want to be your blog’s homepage is named home.php. This will be the page displayed at the root of your domain.
Next, you’ll want to create a new file named blog.php and place the following code within the file:
<?php
/*
Template Name: Blog
*/
// Which page of the blog are we on?
$paged = get_query_var(‘paged’);
query_posts(‘cat=-0&paged=’.$paged);
// make posts print only the first part with a link to rest of the post.
global $more;
$more = 0;
//load index to show blog
load_template(TEMPLATEPATH . ‘/index.php’);
?>
That is all you need for code in that file. Upload it to your theme. This code creates a loop of your index.php file in your theme (commonly used as the single post page) and displays it as a typical blog homepage. Because this page will pull from your index.php file, going forward, any changes you make to your index.php file will update on this page as well.
Now, go into your dashboard and create a new page called Blog. Then select the Blog file you just created in the Page Template drop-down menu in the right sidebar.
Once that is done, the last thing you need to do is go over to your permalink structure page (under Manage) and add /blog/ to your custom permalink structure. This means if you are using an optimal permalink structure, you would want to use a custom structure of /blog/%postname%/. If you are doing this to an established blog, you can easily use the Permalink Redirect plugin to redirect your old permalink structure to the new one.
Conclusion – How To Pick a WordPress Theme
Choosing a theme is not complicated once you know what you are searching for. To make the process easier, I’ve provided these tips for you to follow.


